5 Exercises You Should Avoid and The Best Exercises to Replace Them With
In fitness and exercise, there are hundreds if not thousands of exercises to chose from to improve your strength and conditioning. Just about every exercise has its benefits. However, there are several common exercises where…
- The benefits are not worth the risk of injury
- The exercise does not transfer very well to support the most common movements we perform on a daily basis
I will admit I have performed most of these exercises in my fitness program in the past. Not knowing it at the time, some of these exercises promote muscle imbalance, undesirable movement patterns, and create significant stress to tendons, ligaments, and joints.
In this article, I explain why these exercises are not the best and show you replacement exercises that are safer, less stressful to your joints, and will have better “exercise transference” to reinforce the movements you perform at home, at work, and in your chosen sport.
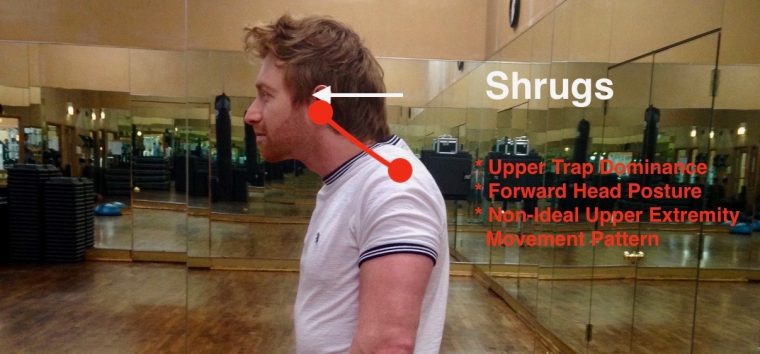
1. Shrugs
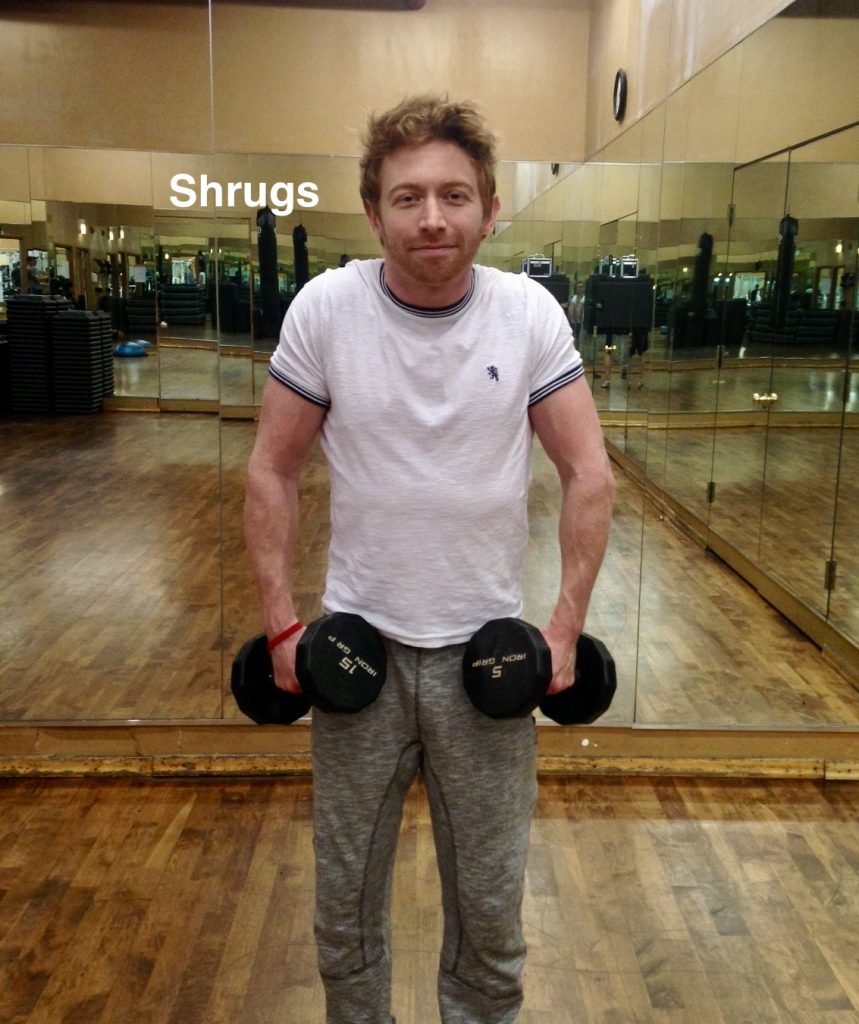
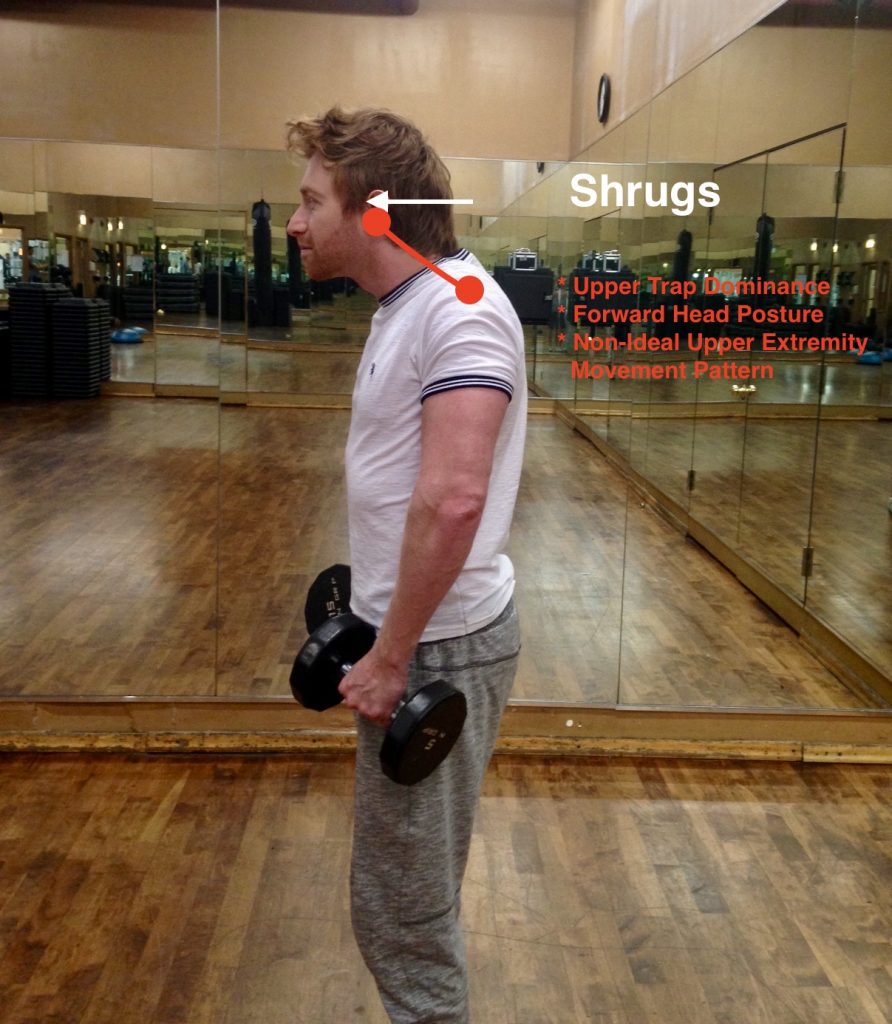
This exercise can promote 3 problems…
- A muscle imbalance between the upper traps (they become tight) and the mid-lower traps (they become weak). Many people are already upper trap “dominant” from stress, shoulder injuries, neck pain, etc. The last thing these people need is shrugging exercises that perpetuate this problem.
- Poor posture of elevated shoulders and forward head posture. Most people shift their head forward during the shrugging motion. This will create, and is often a sign of an imbalance between neck extensor muscles (back of neck) and deep neck flexor muscles (front of neck), a common cause of neck pain and headaches.
- A non-ideal upper extremity movement pattern. If you are holding something in your hand, such as a purse, bag of groceries, or bucket of water, and you have to place it on a table or countertop, wouldn’t you bend your elbow when you lift it up? What is the natural motion of your arms when you pull up a pair of pants? Get the idea? There are few instances where we would lift an object up to or above waist level without bending our elbow.
Here is a better replacement exercise that is similar to how we naturally lift our arms and hands up…
Modified Upright Row
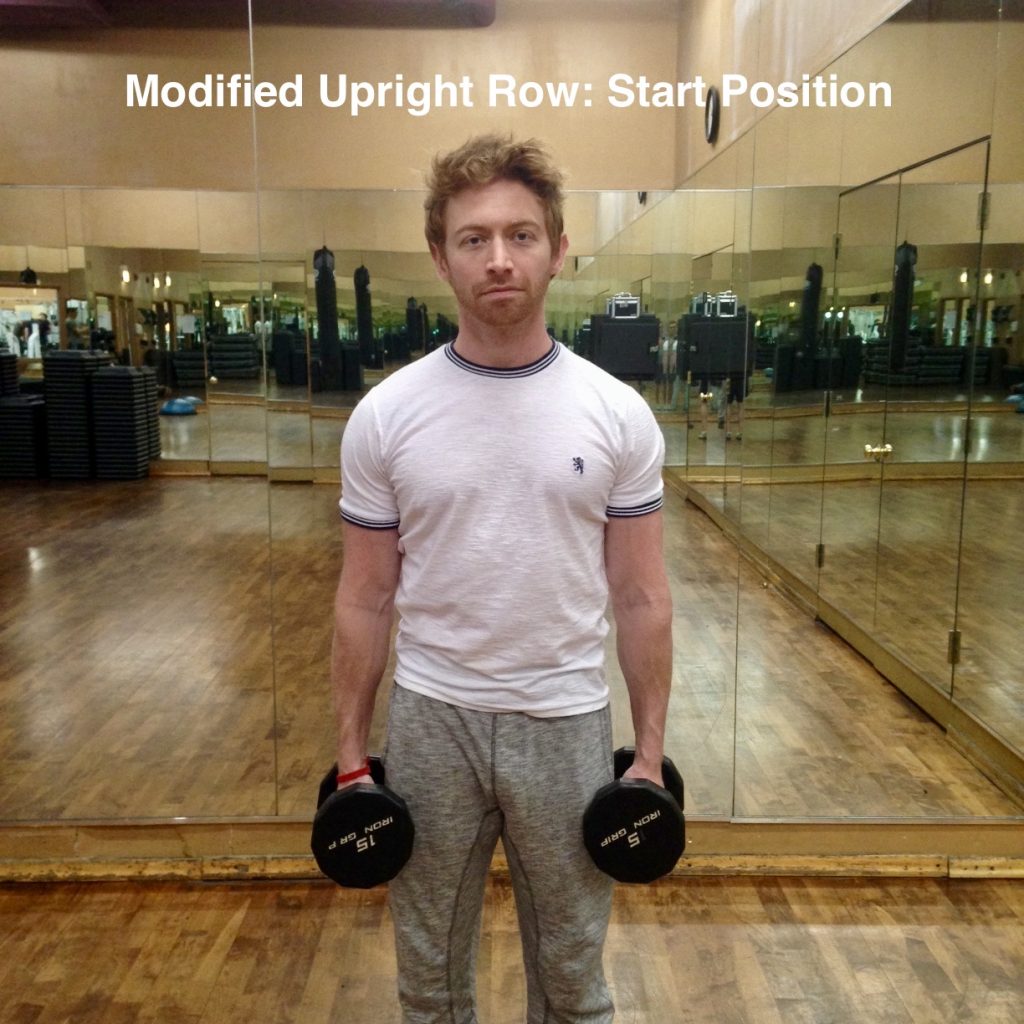

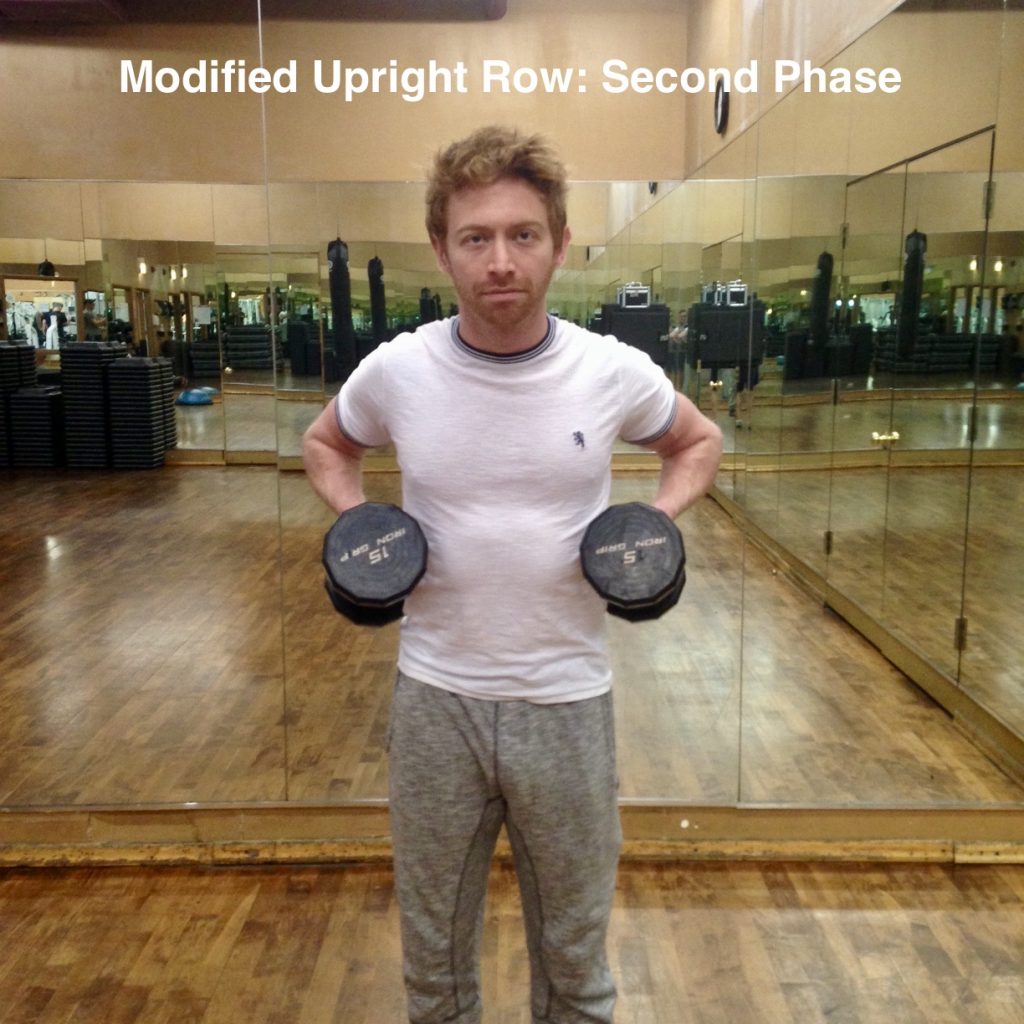
The keys to this exercise…
- Avoid over-gripping the weights with your hands
- Maintain a slight chin tuck without tilting your head down. This will ensure your neck stabilizing muscles are activated
- Engage your abdominals without pulling them in
- Think about performing the lift with your elbows instead of your hands
I recommend performing this motion first without weight until the movement feels natural and fluid. Then use light dumbbells to add resistance. You can gradually increase weight over time as long as proper form is maintained.
2. Lateral and Front Raises
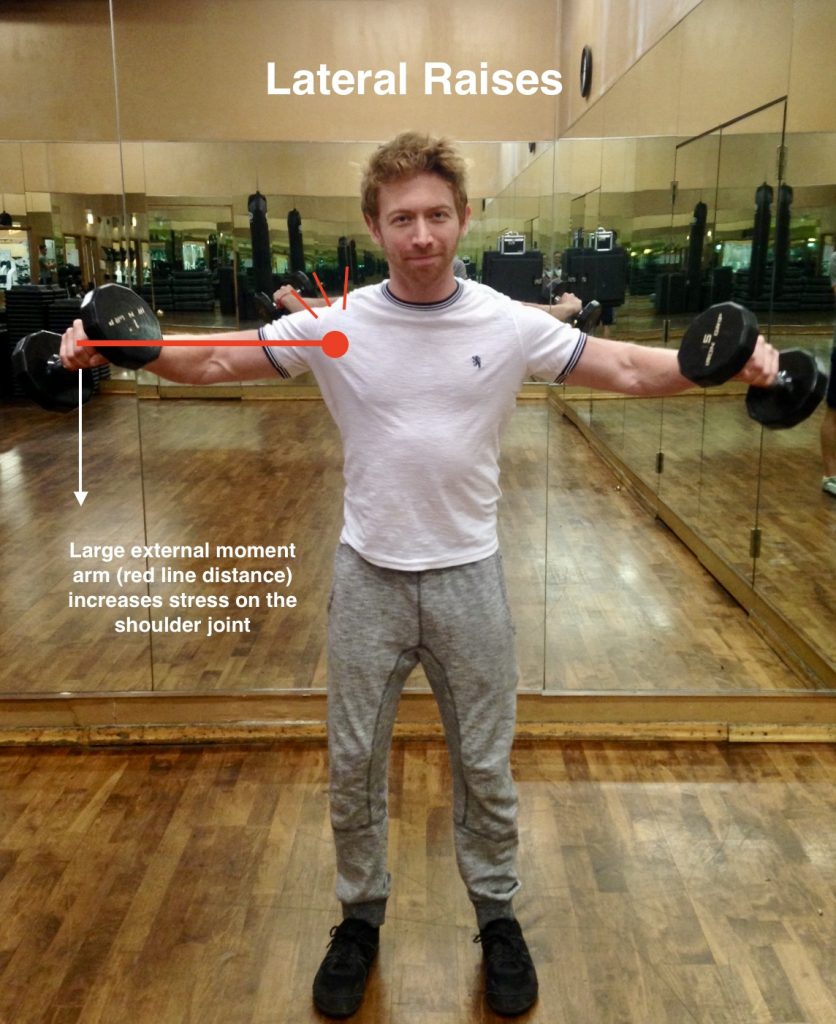
There are 2 problems with this exercise…
- It creates high amounts of stress on the shoulder joint and rotator cuff. The further away the weight is from the body, joint stress rises exponentially. The stress on the shoulder quadruples compared to an alternative exercise where the weight is kept a closer distance from the shoulder.
- A non-ideal upper extremity movement pattern. If you have to lift something up and place it on a shelf, are you going to perform a front or lateral raise to do it? Likely not. You will bend your elbow and keep the object close to your body until that final reach to put the object down.
Here is a much safer shoulder exercise. It is a modification of the traditional shoulder press…
Modified Shoulder Press
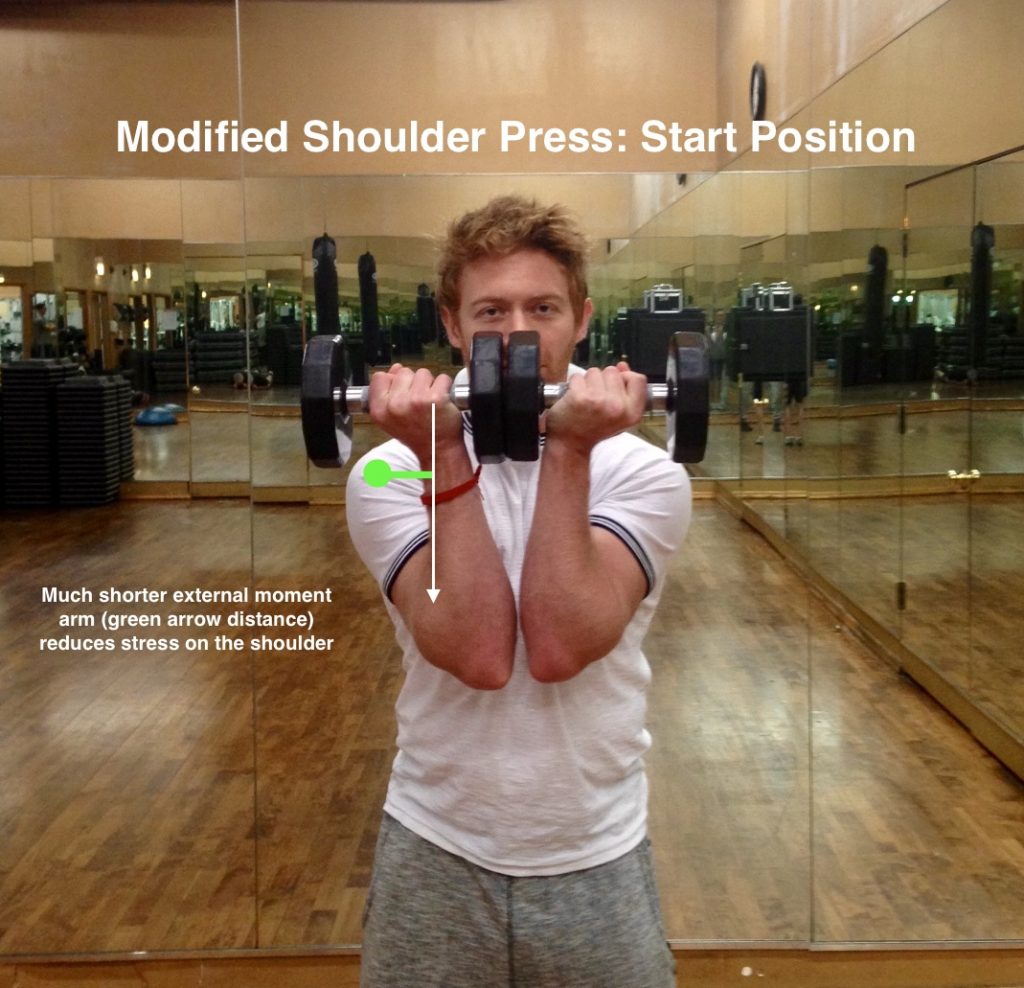
Use a comfortable amount of weight that you can easily complete 10 repetitions. Start by holding the weights in front of you with back of hands facing forward. If you have good shoulder flexibility, elbows should be touching. If they do not touch, bring them together as far as possible without straining or forcing them together. As you press the weight overhead, the elbows move outward and upward in an arcing motion and the hands rotate so the hands face forward at the top. The arms and hands will reverse in the same movement path coming down.
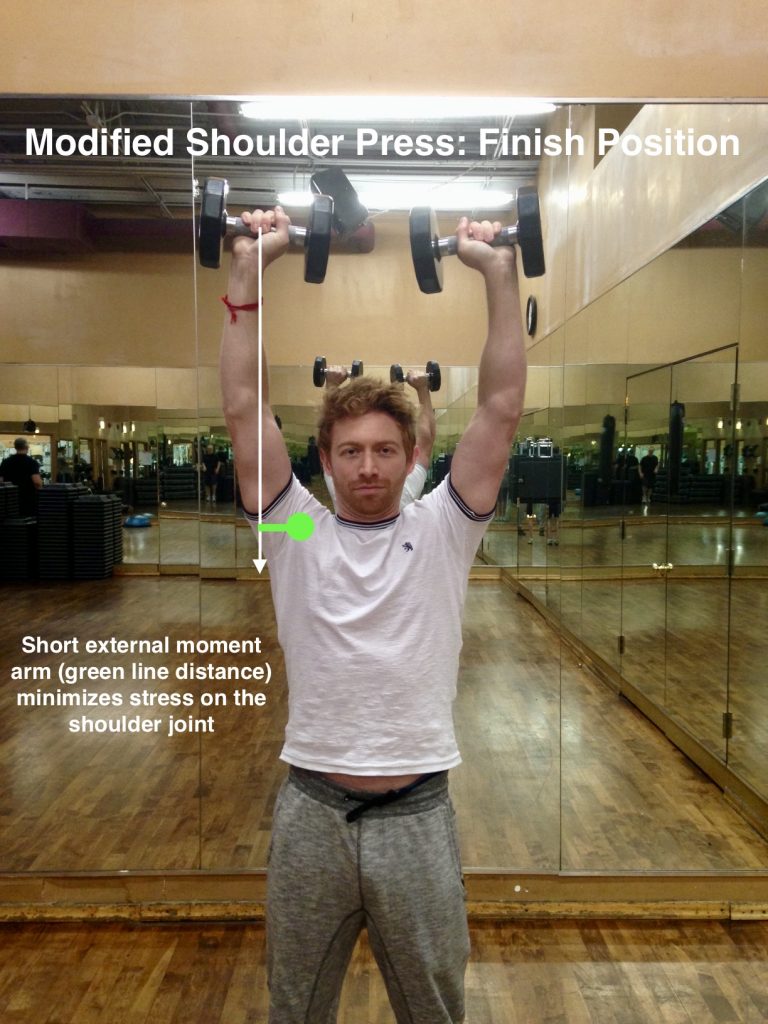
I recommend performing this motion first without weight until the movement feels natural and fluid. Then use light dumbbells to add resistance. You can gradually increase weight over time as long as proper form is maintained. Be sure to maintain a slight chin tuck without tilting the head down. Make sure your abdominals are engaged without pulling them in and your ribcage does not lift up during the overhead press.
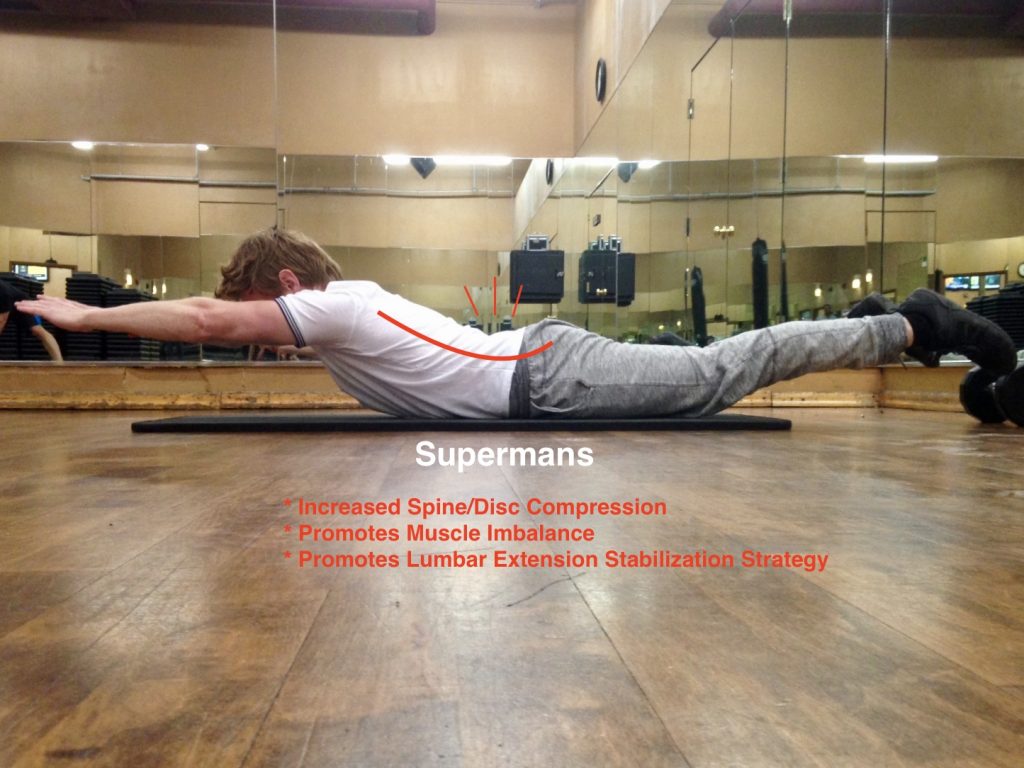
3. Supermans
This also includes any lumbar extension exercise, such as performed on a Roman chair or weight machine.
This exercise poses 3 problems…
- It creates a significant amount of compression (pressure) on the lumbar discs. This can lead to disc bulging, herniation, degeneration and low back pain.
- Muscle imbalance between the abdominals and lower back. Most people use all back muscles and very little abdominal muscles in this exercise. Any exercise of the trunk should involve all of the muscles being activated at the same time.
- An incorrect core stabilization strategy. When we have to stabilize our core, we should simultaneously engage our abs, diaphragm, pelvic floor and to a lesser extent, the back muscles. This creates intra-abdominal pressure (IAP) which protects the spine. Arching the low back (lumbar extension stabilization strategy) is not an ideal way to stabilize the core and the spine can become damaged and painful over time.
2 Predisposing Causes of Back Pain Everyone Needs to Know About
Here are a couple alternative replacement exercises that work the entire core, especially the abdominals…
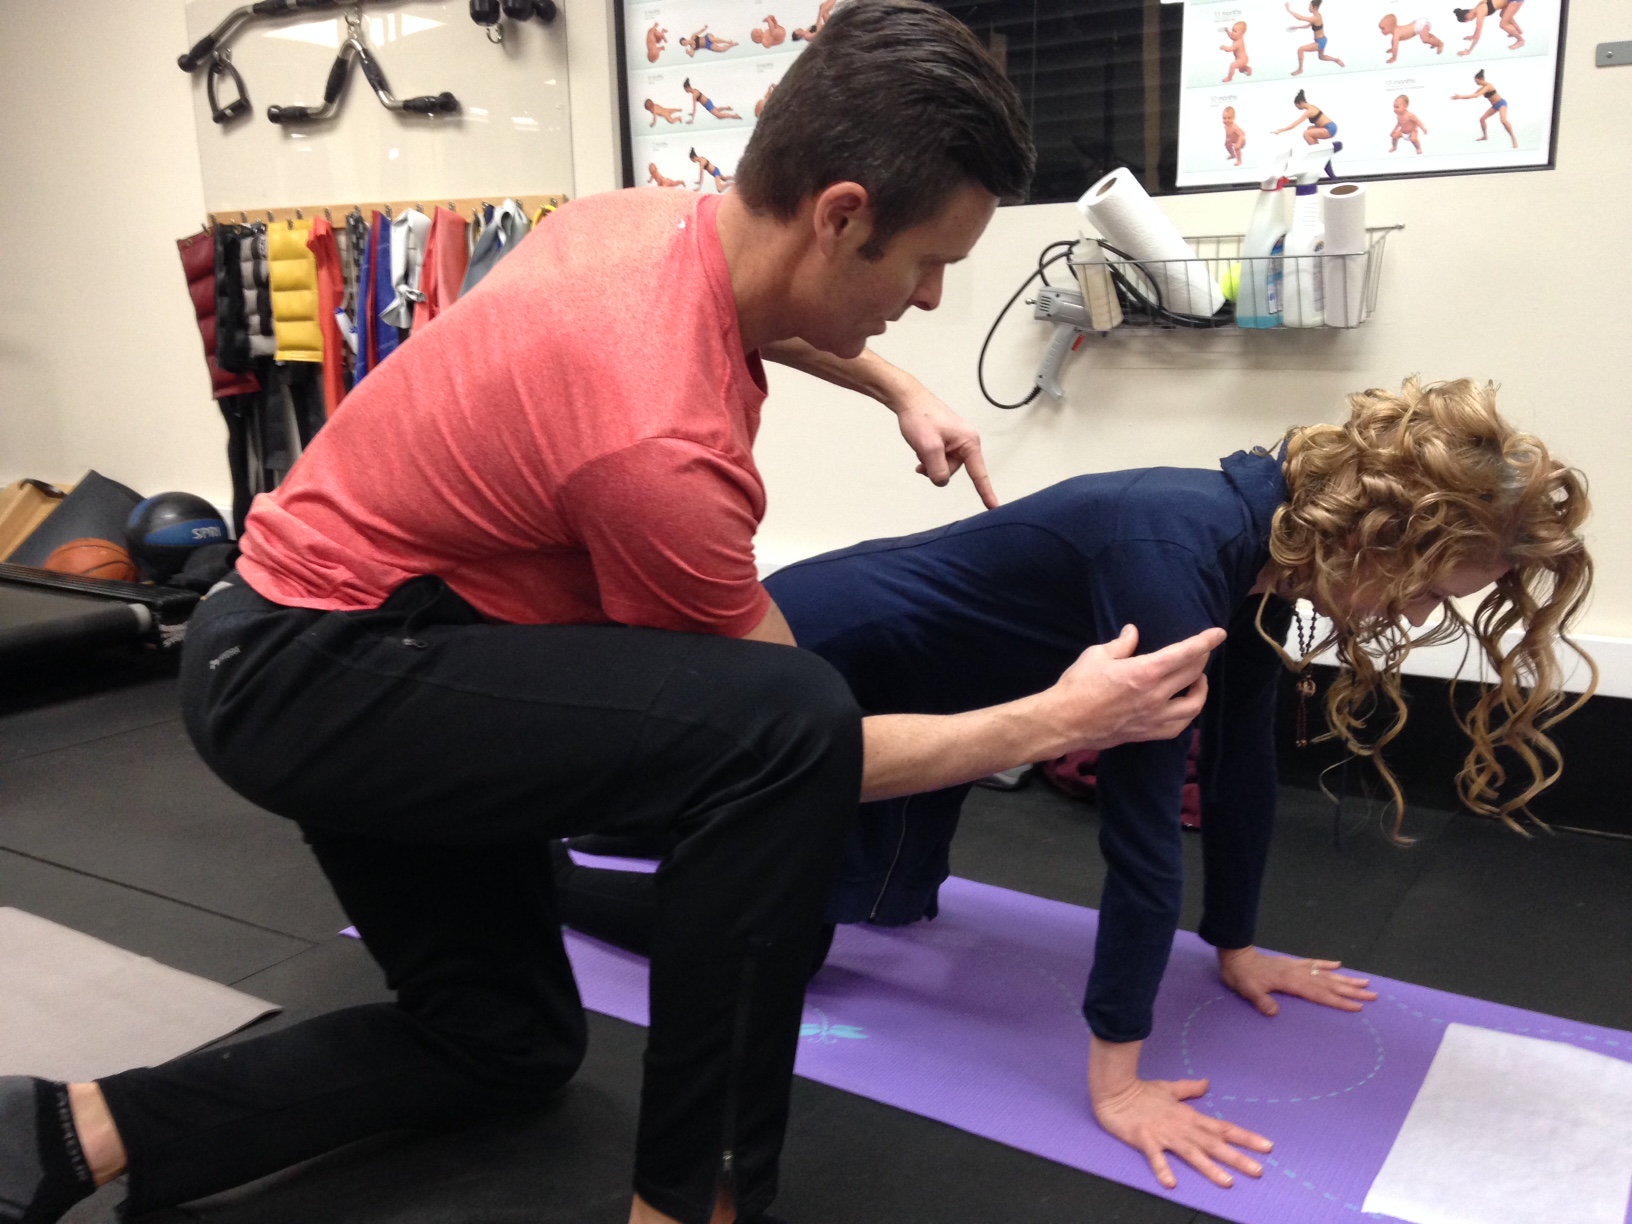
Low Kneeling Plank
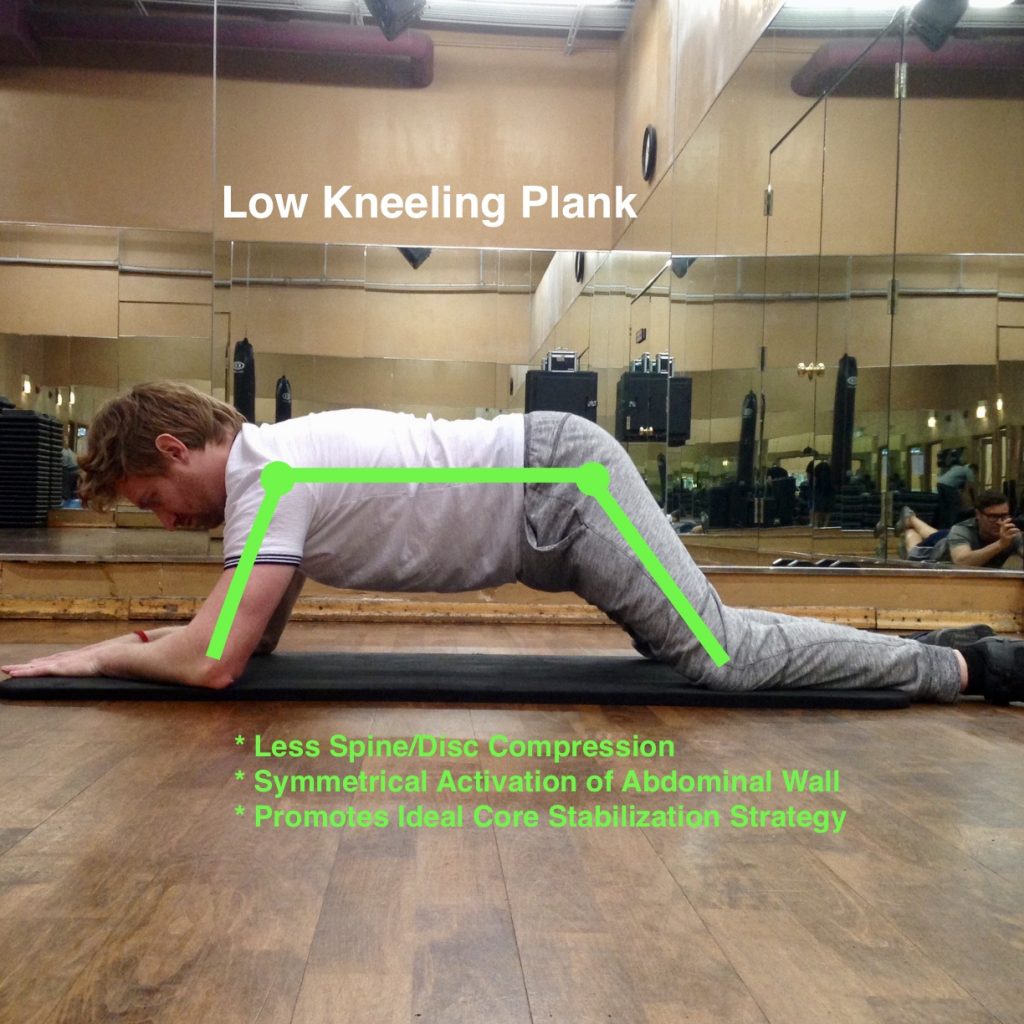
Start with elbows and knees shoulder width apart. The elbows and knees can be closer together (lengthwise) in the beginning, then gradually farther apart to increase difficulty.
The keys to this exercise…
- Head and spine are kept in a straight line
- Slight chin tuck with the back of your head pulled up towards the ceiling
- Engage your abdominals without pulling them in
- Focus on breathing into your entire abdomen
- Watch out for your head and chest dropping to the floor and collapsing in between your shoulder blades (spine sinks between the shoulder blades)
- Hold the correct position until fatigue or until you are unable to maintain proper position.
Plank on Hands and Knees
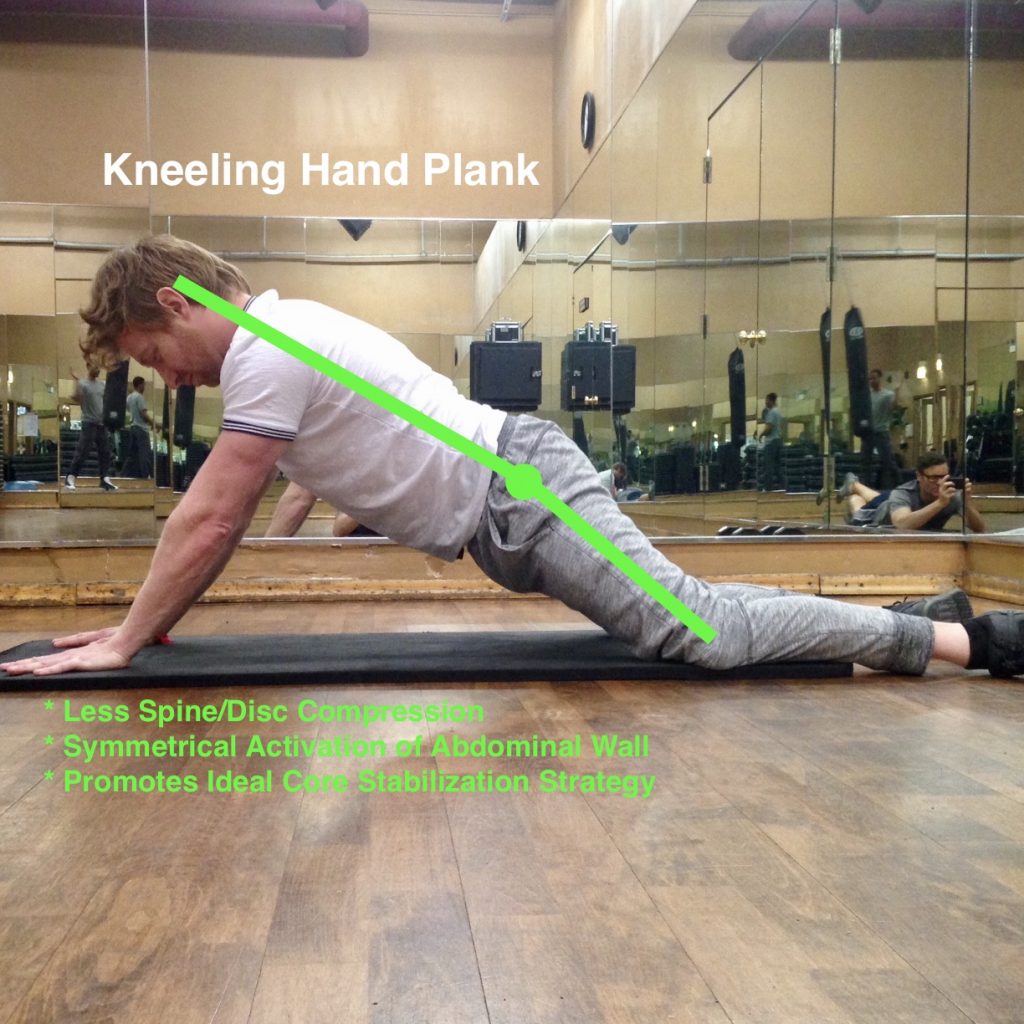
The keys to this exercise are similar to the Low Kneeling Plank. Start with hands and knees shoulder width apart. The hands and knees can be closer together (lengthwise) in the beginning, then gradually make them farther apart to increase the difficulty.
The keys to this exercise…
- Equal support on the inside and outside of the heel of the hands
- The entire hand is in contact with the floor
- Head, spine and eventually the thighs are kept in a straight line
- Slight chin tuck without tilting the head down
- Engage your abdominals without pulling them in
- Focus on breathing into your entire abdomen
- Watch out for your head and chest dropping to the floor and collapsing in between your shoulder blades (spine sinks between the shoulder blades)
- Hold the correct position until fatigue or until you are unable to maintain proper position.
A traditional plank on elbows and toes or hands and toes can also be used (not shown). The same rules apply for this exercise as the ones previously mentioned.
4. Knee Extensions and Hamstring Curls
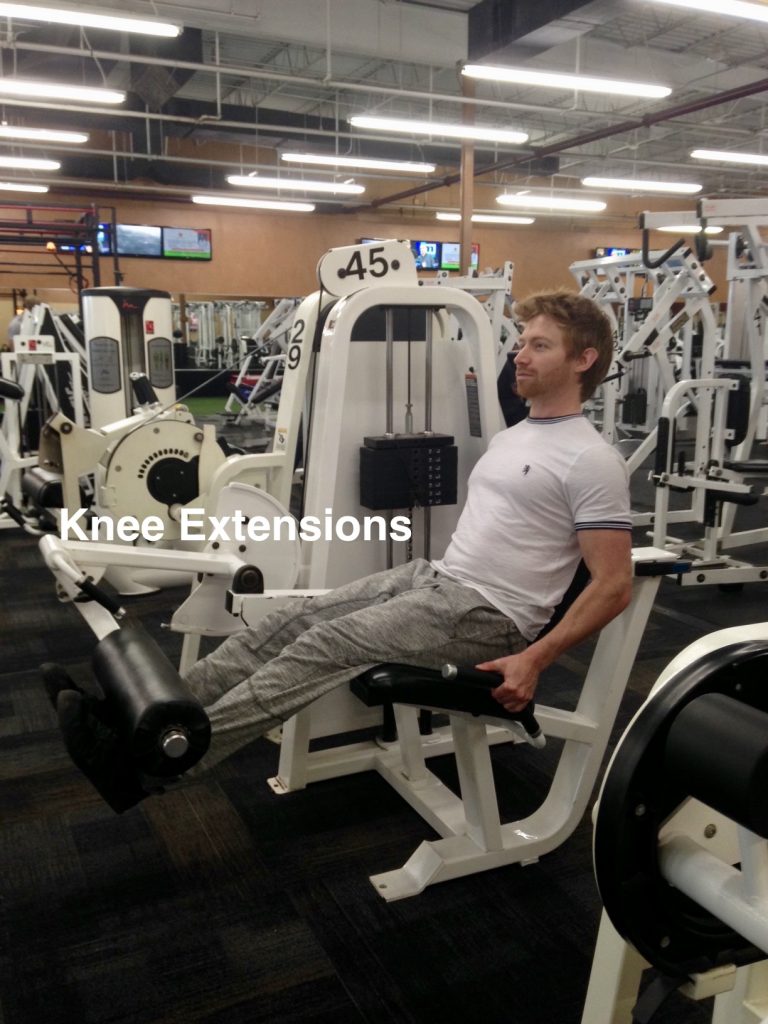
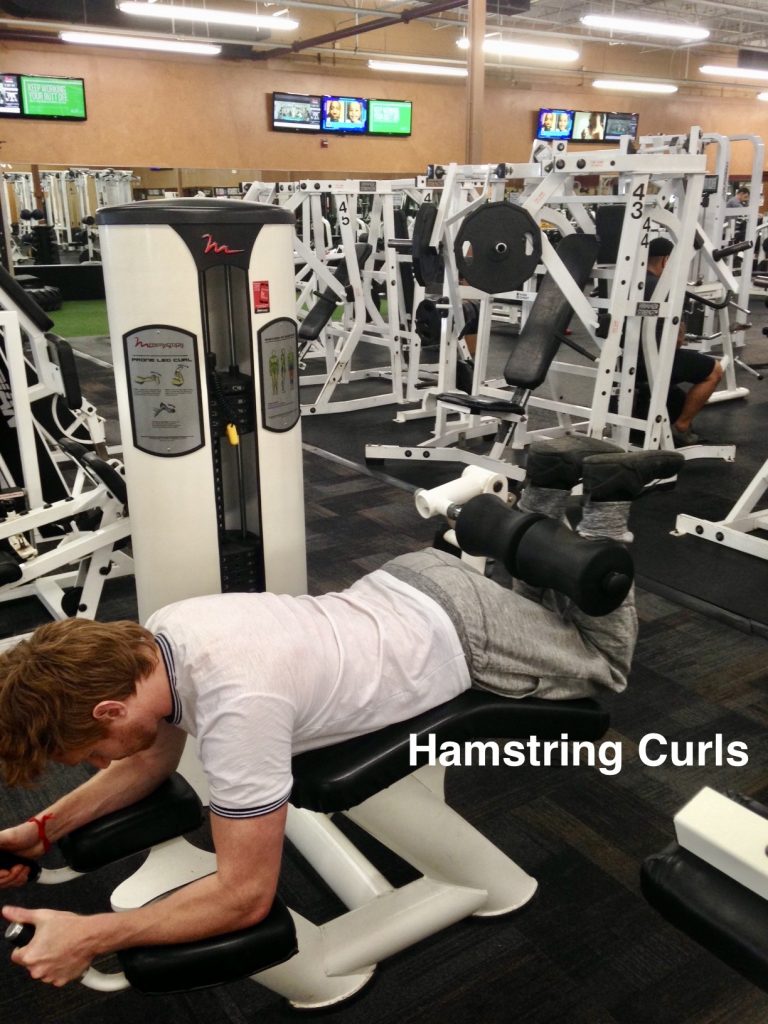
These 2 exercises promote…
- A muscle imbalance between the the quad/hamstring group and the glutes. Many people are quad/ham dominant because they have lost their ability to activate their glutes. These exercises commonly involve little use of the glutes which can perpetuate the muscle imbalance.
- A non-ideal lower extremity movement pattern. Unless you are involved in any sports that involve kicking, these exercises do not offer much benefit in real life scenarios. Most movements of the lower body, such as squatting, involve simultaneous bending of the hip, knee, and ankle. They also involve simultaneous use of the glutes, quads, hamstrings, and other muscles. No muscle in the legs works in isolation, so why should we train them that way?
For the legs, your best bet is to stick with traditional squats, split squats, or lunges.
Squats
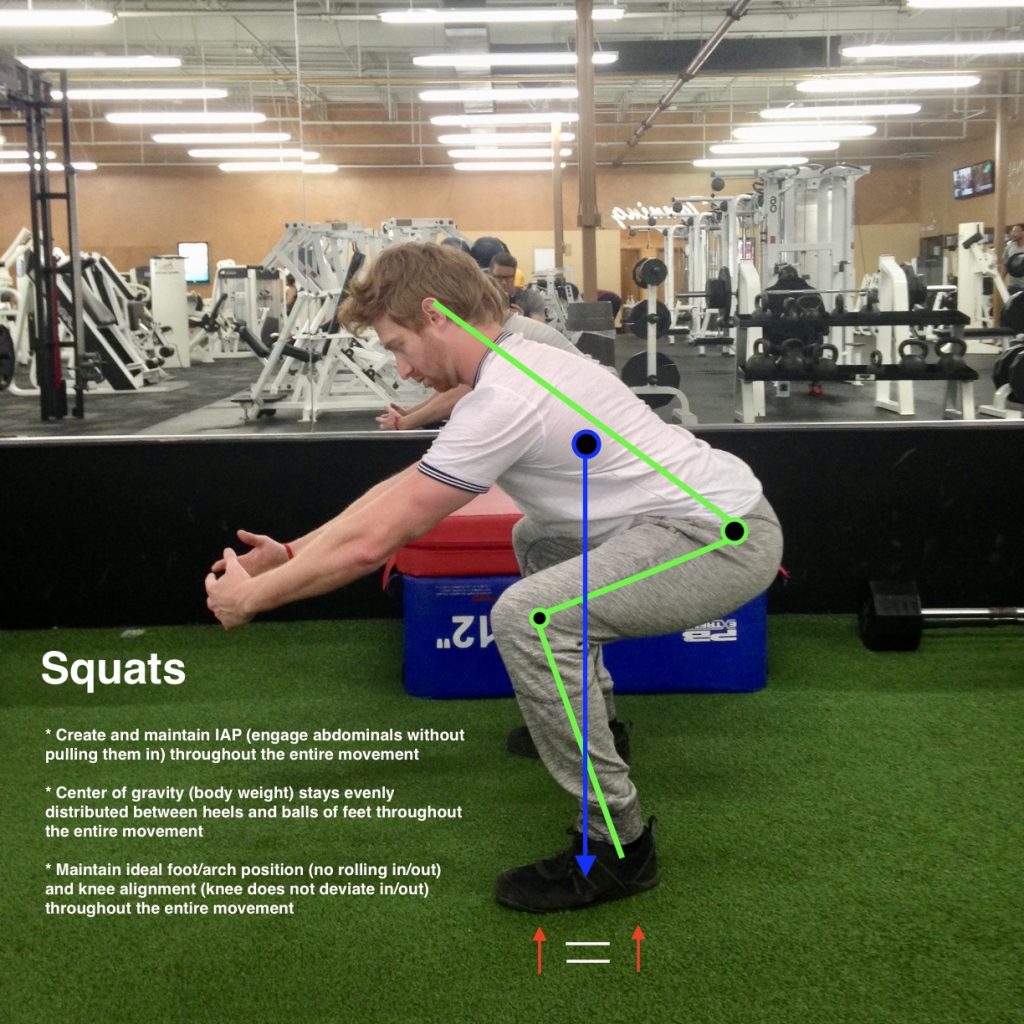
The keys to these exercises…
- Your center of gravity (body weight) stays evenly distributed between the heels and balls of feet in the squat, heel and ball of front foot in split squats and lunges. This weight distribution must be maintained going down and coming back up
- In split squats and lunges, 80 percent of your weight should be on the front foot, 20 percent on the back foot
- Maintain ideal foot/arch position (no rolling in/out) and knee alignment (knee does not deviate in/out) throughout the entire movement
- Create and maintain good intra-abdominal pressure IAP (engage abdominals without pulling them in) throughout the entire movement
5. Crossover Reverse Lunges
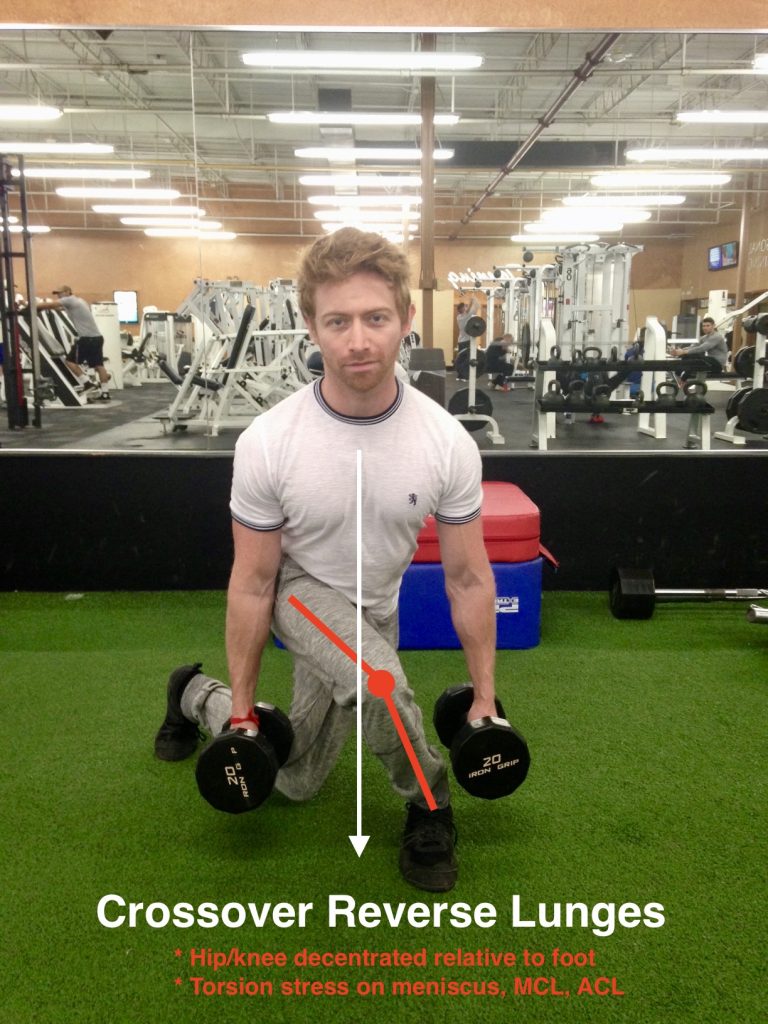
This is a high risk exercise for a knee injury. During the exercise, the femur is in full internal rotation on the tibia and the hip is outside the knee. This is a decentrated position of the lower extremity. In other words, the foot, knee and hip do not stay centered/aligned during the movement. In this exercise, the torsion (twisting) stress is borne on the meniscus, medial collateral and anterior cruciate ligaments. This is the most common position for tearing/injuring these structures.
Just because you can get your body in a certain position does not necessarily mean you should apply load (add resistance) in this position. In my opinion, the benefit of this exercise is not worth the risk of injury.
The safest and least stressful exercises on the knee requires ideal alignment of the lower extremity…knee stacked over the foot, hip stacked over the knee.
The replacement exercise is a straight step-back reverse lunge.
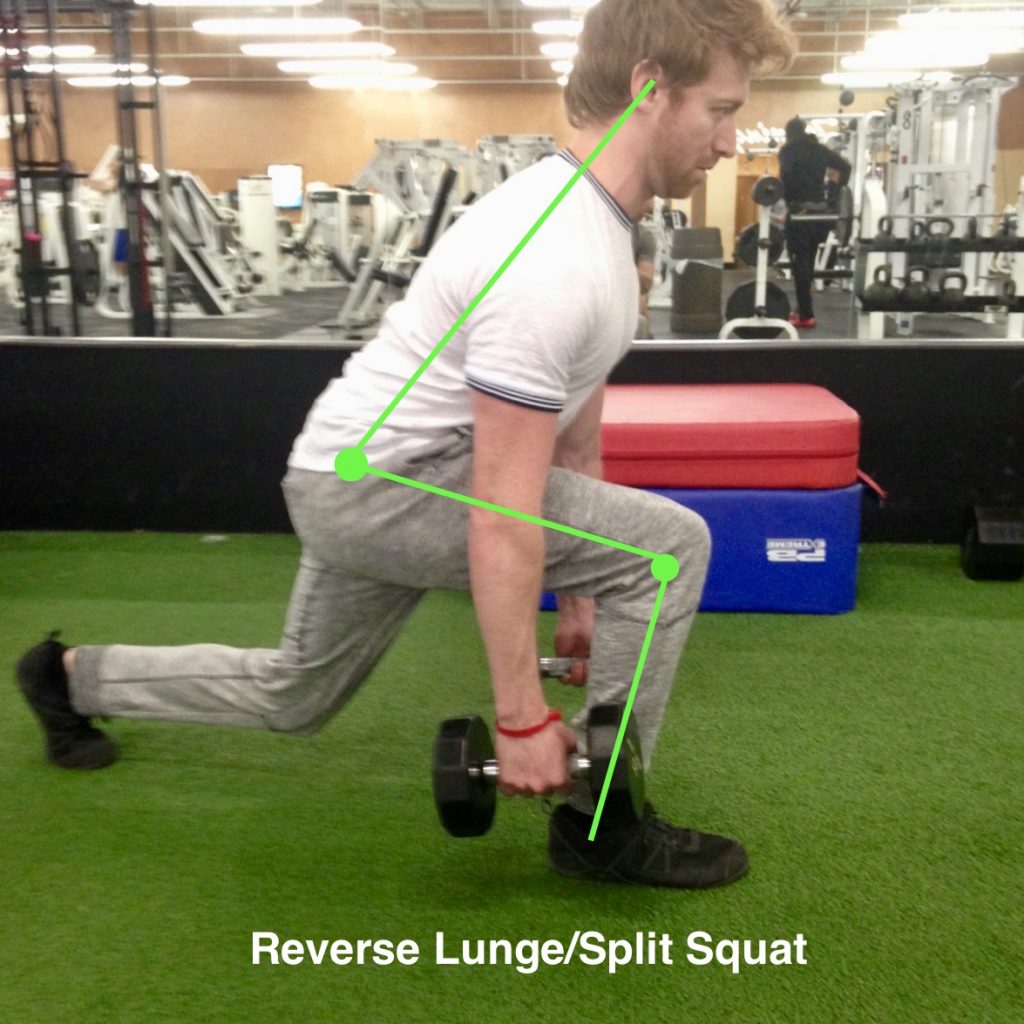
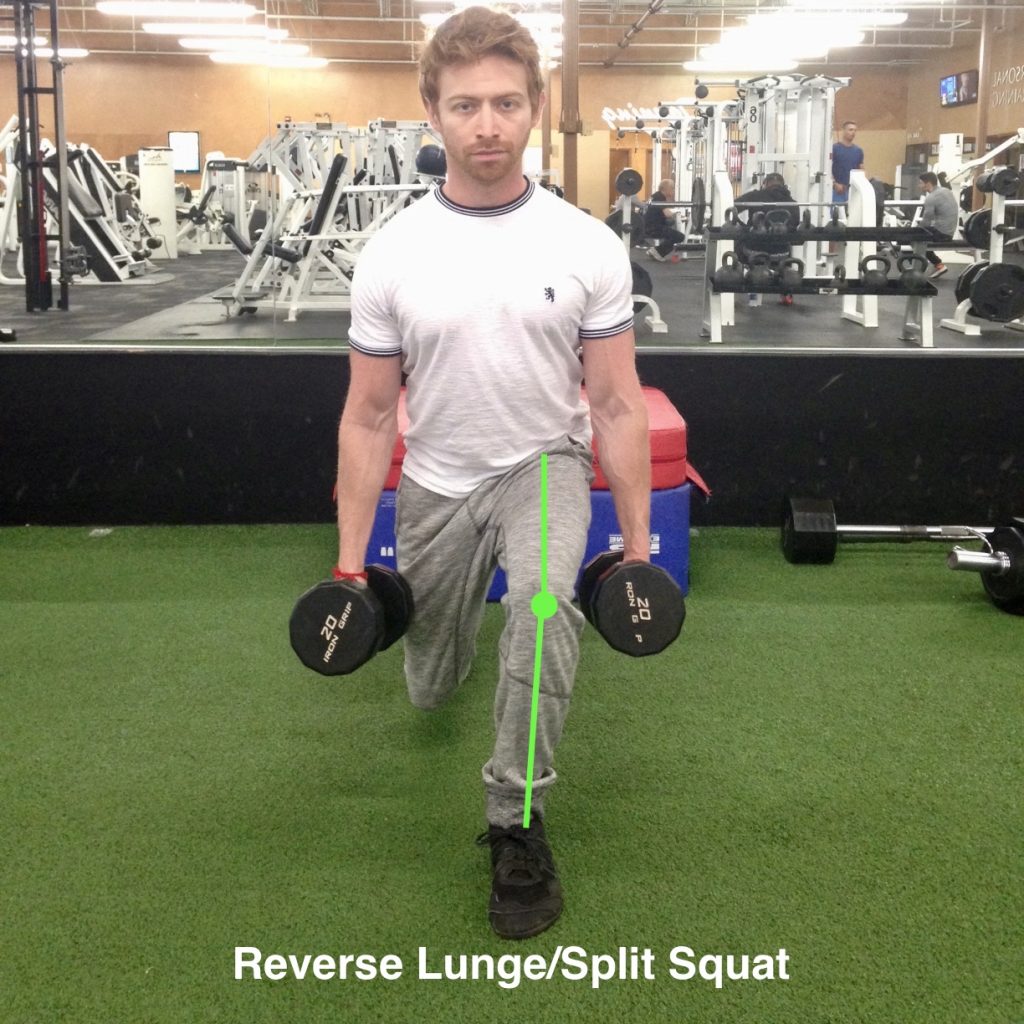
Reverse Lunge
If you are new to this exercise, I would recommend doing this as a split squat first, then add the dynamic step-back during each repetition.
The keys to this exercise…
- 80 percent of your weight should be on the front foot, 20 percent on the back foot
- Your center of gravity (body weight) stays evenly distributed between the heels and balls of the front foot. This weight distribution must be maintained throughout the entire movement
- Maintain ideal foot/arch position (no rolling in/out) and knee alignment (knee does not deviate in/out) throughout the entire movement
- Create and maintain good intra-abdominal pressure IAP (engage abdominals without pulling them in) throughout the entire movement
Exercise should be about building your body up without breaking it down. If you workout smart, focus on form and listen to your body, you can reap the benefits of exercise without creating muscle imbalance, succumbing to injury and developing pain.
You can work out hard, but most importantly, work out SMART!